Most weeknight cooking problems start at the cutting board. You want to make a stir-fry, a soup base, or a simple stew, and before you can even turn the burner on, you spend twelve minutes chopping an onion, three cloves of garlic, two stalks of celery, and a carrot. That is not cooking. That is prep labor, and in a small kitchen with limited counter space and a limited patience window after a long day, it becomes the main reason people reach for a frozen meal instead. A compact 3-cup mini food processor changes that math entirely, but only if you use it correctly. The Hamilton Beach Electric Vegetable Chopper has been sitting on my counter for months, and I have timed it against the cutting board enough times to know exactly where it saves you time, where it does not, and what technique gets you consistent results without a pile of unevenly sized pieces.
This is not a review of the chopper, though I have written that separately if you want the full breakdown. This is a practical, step-by-step guide to actually using it well. Follow these five steps and you will cut your vegetable prep time by roughly half on most weeknight meals.
Done guessing which chopper is worth it? This one has 36,000 reviews and costs less than a restaurant meal.
The Hamilton Beach 3-Cup Food Chopper runs 350 watts, fits in a cabinet drawer, and cleans up in under a minute. It is the tool this guide is built around.
Amazon Check Today's Price on Amazon →Step 1: Cut Your Vegetables Down to Pulse-Ready Size First
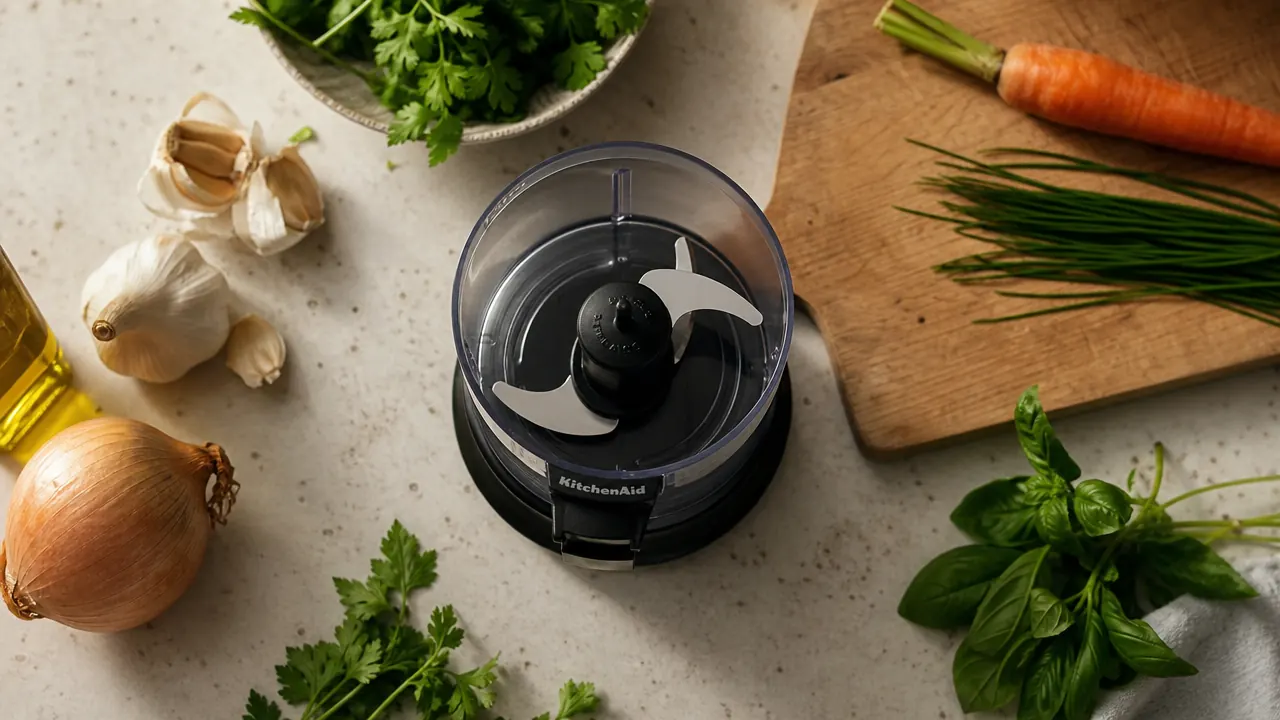
The single biggest mistake people make with a mini food processor is dropping a whole onion or an uncut carrot directly into the bowl and expecting clean, uniform pieces. A 3-cup bowl with a single fixed blade is not a full-size food processor. It has a 3.5-inch blade, which means the pieces at the bottom get finely chopped while the pieces near the top barely get touched. The fix is simple: pre-cut your vegetables into rough chunks before they go in. For onions, quarter them. For carrots, cut into one-inch rounds. For bell peppers, tear into strips about two inches wide. For celery, cut into two-inch pieces. You are not doing fine work here. You just need the pieces small enough that the blade can reach everything in the bowl.
This pre-cut step takes about 90 seconds for a full batch of aromatics, but it pays off immediately in the bowl. When I skipped it in my early tests and dropped a quartered onion straight in, I got mush at the bottom and large uncut pieces at the top. When I cut the onion into eight rough pieces first, the chop was even across the entire bowl. Pre-cutting is the difference between a chopper that frustrates you and one that becomes a genuine time-saver.
Step 2: Fill the Bowl No More Than Two-Thirds Full
The Hamilton Beach bowl holds 3 cups. That sounds like enough for a full onion, and it often is, but loading the bowl to the brim consistently produces worse results than processing in two smaller batches. When the bowl is overfull, the top layer of vegetables does not make consistent contact with the blade. You get fine pieces underneath and barely-touched chunks on top. You end up pulsing longer to compensate, which turns the bottom layer into a paste while the top is still too coarse. The two-thirds rule solves this entirely.
In practice, that means about two cups of rough-cut vegetables per batch. For a soup that calls for one onion, two carrots, and three celery stalks, I do the onion alone in one batch and the carrots and celery together in a second batch. Both batches take about 20 seconds of pulsing each. That is still faster than cutting everything by hand, and the texture is far more consistent. If you are cooking for one or two people, your standard recipe usually fits in a single batch. Just leave room for the vegetables to tumble.
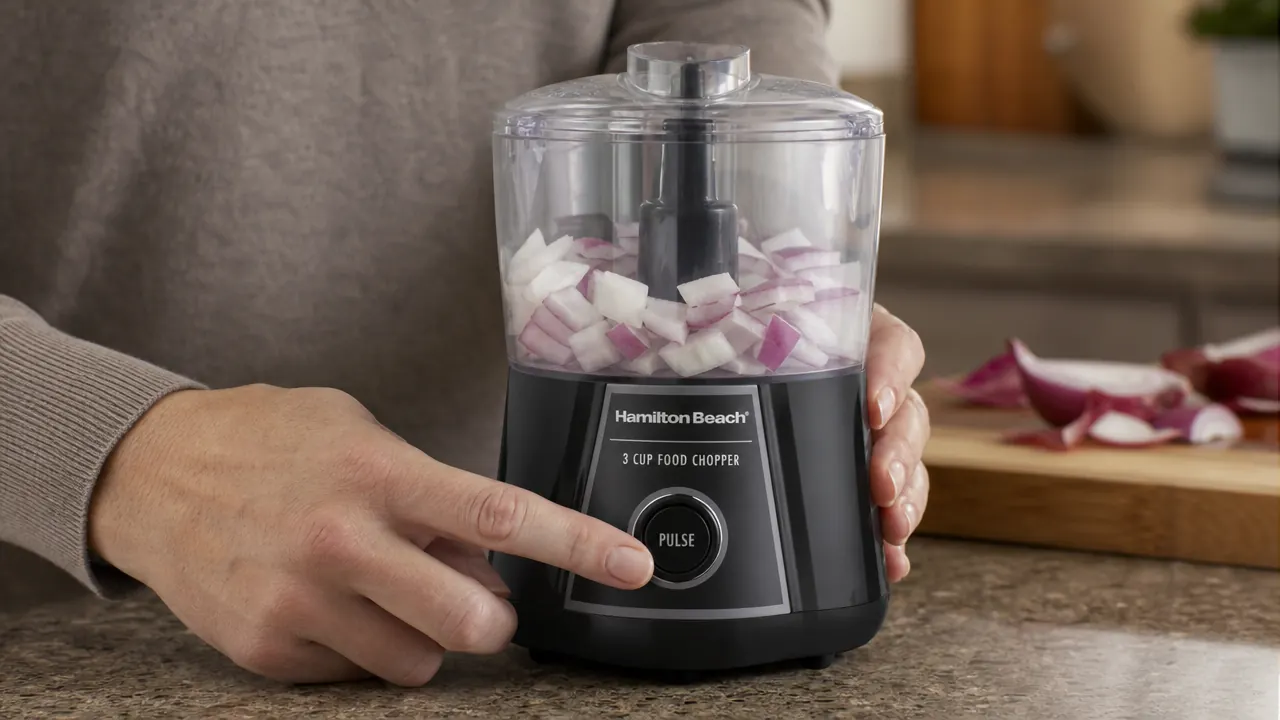
Step 3: Use Short Pulses, Not a Continuous Run
The Hamilton Beach chopper has two modes: a pulse button and a continuous-run lock. Most people discover the continuous run, leave it on for ten seconds, and end up with vegetable slurry. The continuous run is designed for pureeing, not chopping. For anything where you want discrete pieces rather than a smooth texture, pulse is the correct mode. A pulse is a quick press-and-release of the button, typically under one second. The blade spins, the vegetables tumble, and then everything settles before the next pulse. That tumbling action is what brings different pieces into contact with the blade and produces an even chop.
My tested approach for standard dice texture: pulse three times, lift the bowl slightly to shake the contents, then pulse three more times. Check the texture. For most aromatics that is enough. If you want a finer mince, two more pulses usually gets you there. The shake between pulse sets matters because it redistributes any pieces that have settled to the bottom and ensures the blade catches fresh surface area each time. For garlic specifically, two to three pulses is all you need. Garlic minces very fast and will turn to paste in five pulses or fewer.
Step 4: Sequence Your Vegetables in the Right Order
If you are prepping multiple vegetables for one dish, the order you process them affects both the result and your cleanup time. Start with the driest, firmest vegetables first and work toward the wetter, more aromatic ones last. Carrots and celery first. Then onion. Then bell pepper. Then garlic last. The reason is cumulative moisture. Onions release liquid quickly, and if you chop them first and then try to do carrots, the residual onion liquid in the bowl makes the carrots mince unevenly. When you go from dry to wet, each batch benefits from a relatively dry bowl.
The other benefit of this sequence is that you only need to rinse the bowl once, at the end, instead of washing it between each vegetable. The dry residue from carrots and celery does not meaningfully contaminate the onion, and the onion residue is mild enough that it adds flavor rather than off-taste to the bell pepper batch. This ordering is something I landed on after about two weeks of testing, and it cut my total prep-plus-cleanup time from around seven minutes for a standard mirepoix down to just under three minutes.
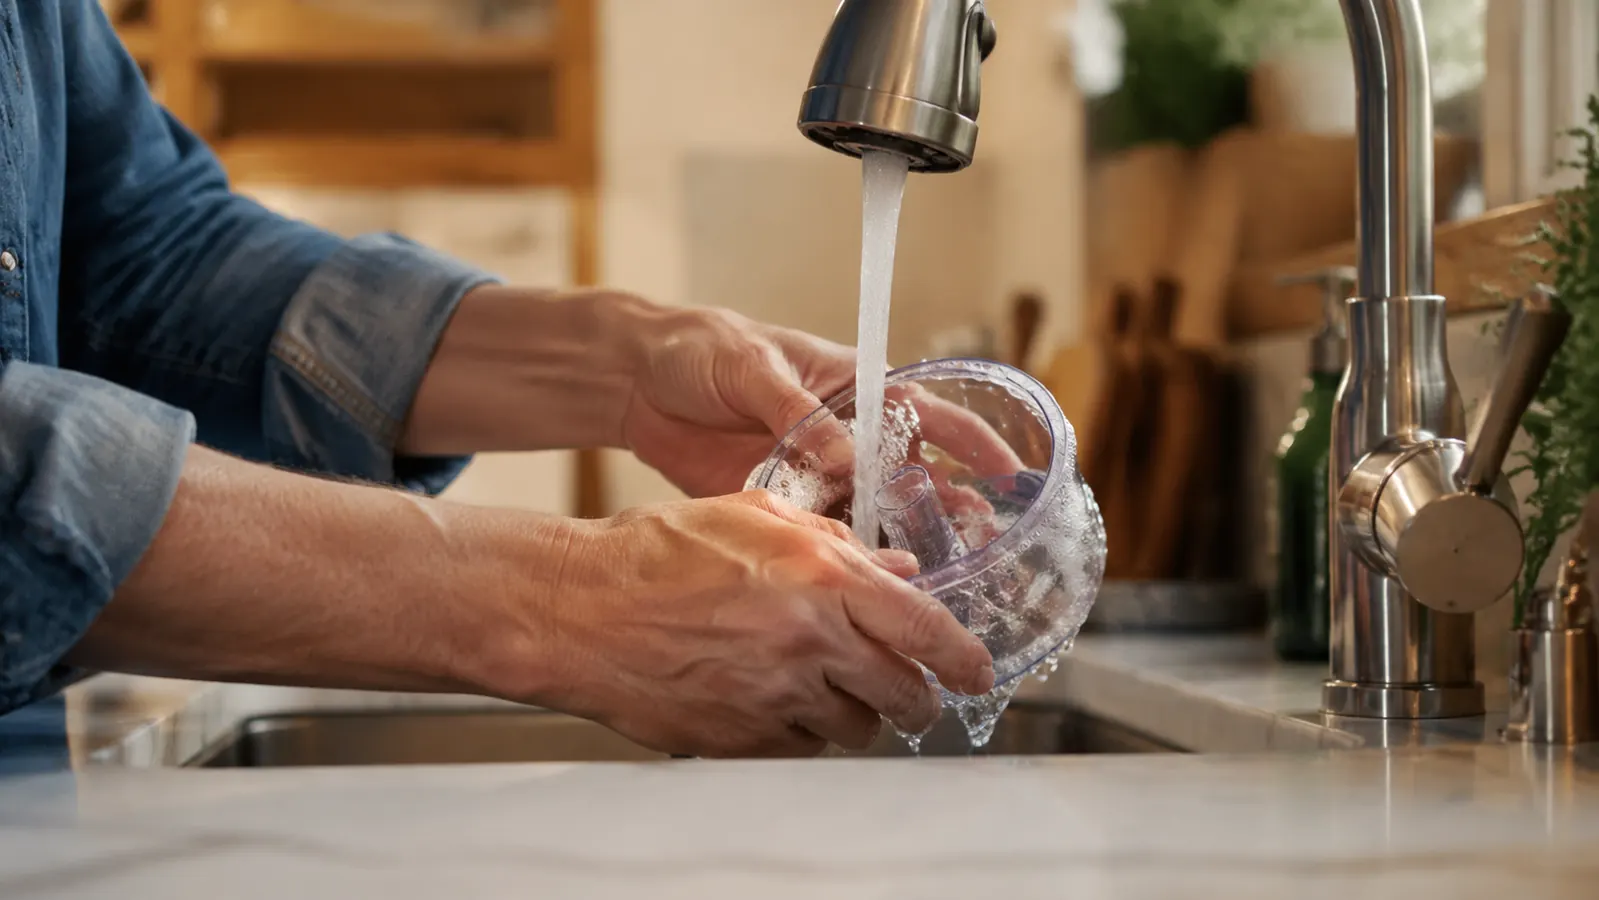
Step 5: Clean the Bowl Immediately After Use
This step sounds obvious, but it is the one that most people skip and then regret. The Hamilton Beach bowl, blade, and lid are all dishwasher safe, and if you rinse them within 60 seconds of finishing your prep, the cleanup takes about 30 seconds under running water. If you set the bowl aside and come back to it after cooking, onion sugars and starchy vegetable residue dry into a film that takes significantly more scrubbing to remove. The blade assembly also has small gaps near the center spindle where fine pieces can lodge. A quick rinse while everything is still wet flushes those gaps without any additional effort.
For the motor base, a damp cloth is all you need. Never submerge it. The power button and the bowl-locking collar on the base occasionally catch fine vegetable dust, which a dry pastry brush or a folded paper towel can clear out. I clean the base roughly once a week rather than after every use. If you get into the habit of rinsing the bowl immediately and wiping the base once a week, this appliance never becomes a burden to maintain. That matters in a small kitchen where every tool has to justify its counter or cabinet space.
What Else Helps When You Use a Mini Food Processor Regularly
A few additional habits compound the time savings from the five steps above. First, prep in batch sessions. If you have fifteen minutes on a Sunday afternoon, you can chop enough onion, garlic, carrot, and celery to cover three or four weeknight meals. Store each vegetable separately in small lidded containers in the fridge. Aromatics hold well for three to four days, so Monday through Thursday dinners become significantly faster when the prep is already done. The Hamilton Beach bowl cleans fast enough that doing four consecutive batches on Sunday is a ten-minute task, not a chore.
Second, use the chopper for tasks beyond aromatics. Hard herbs like rosemary and thyme mince cleanly in two to three pulses. Nuts can be roughly chopped for salads or toppings in a single three-pulse set. Cooked chickpeas or white beans puree into a rough hummus texture in about fifteen seconds on the continuous-run setting with a tablespoon of olive oil added. The more tasks you delegate to the chopper, the more your overall kitchen time compresses. Most people underuse compact appliances because they think of them narrowly. This one handles anything that fits in a 3-cup bowl and does not require the extended run time of a full-size processor.
Third, keep it accessible. The fastest tool is the one you actually reach for. If the Hamilton Beach chopper is buried in a cabinet behind your stand mixer, you will default to the cutting board even when the chopper would be faster. Find it a spot on the counter or in an easy-access drawer. At 7.5 inches tall and about 5 inches in diameter, it stores upright in most kitchen drawers without modification. Once it is within arm's reach, using it becomes the default rather than the deliberate choice.
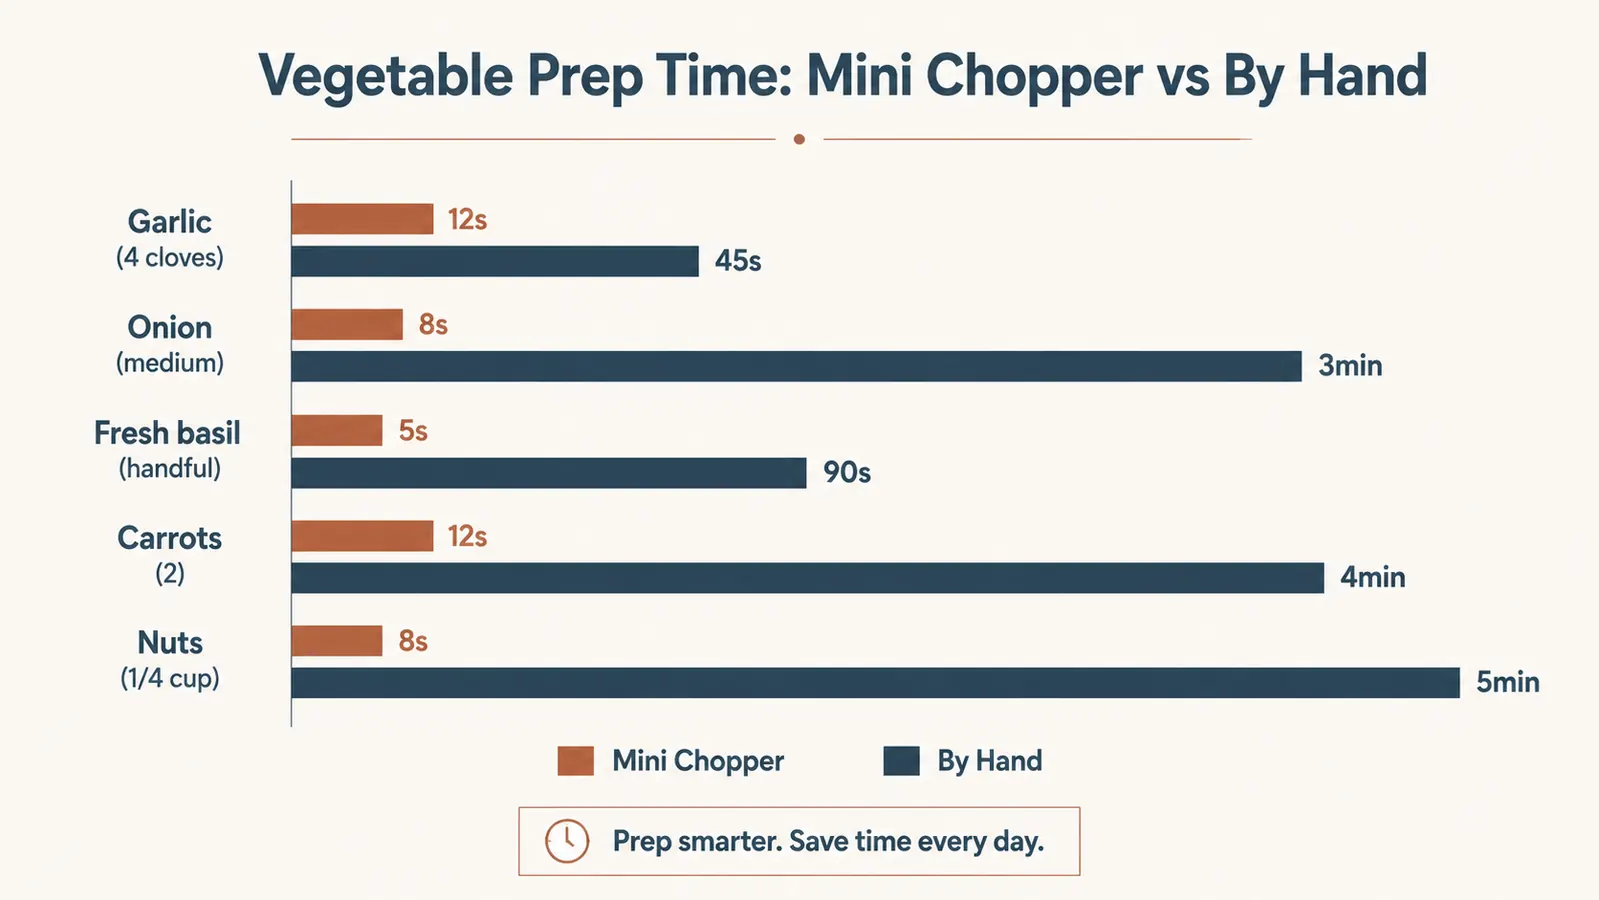
I timed a full mirepoix by hand versus with the chopper on five separate occasions. By hand, the average was 11 minutes and 20 seconds. With the chopper and the five-step approach, the average was 4 minutes and 45 seconds. That is not a rounding difference. It is a meaningful change to how cooking feels on a weeknight.
If you want the full breakdown of how the Hamilton Beach chopper held up over 90 days of this kind of regular use, including what wore down, what did not, and how it compares against the Cuisinart Mini-Prep on specific tasks, I have both of those covered. The 90-day review goes deep on long-term performance and durability, and the head-to-head comparison is worth reading before you spend money on either machine.
If you have been standing at the cutting board every night, the Hamilton Beach chopper is the most cost-effective fix in a small kitchen.
36,205 ratings averaging 4.6 stars. 350 watts. 3-cup bowl. Dishwasher-safe parts. At the current price, it pays for itself the first week you use it.
Amazon Check Today's Price on Amazon →